Create TestNG Project with Script:
Steps:
1. Create TestNG project.
2. Create TestNG class.
3. Execute the TestNG script.
1. Create TestNG project:
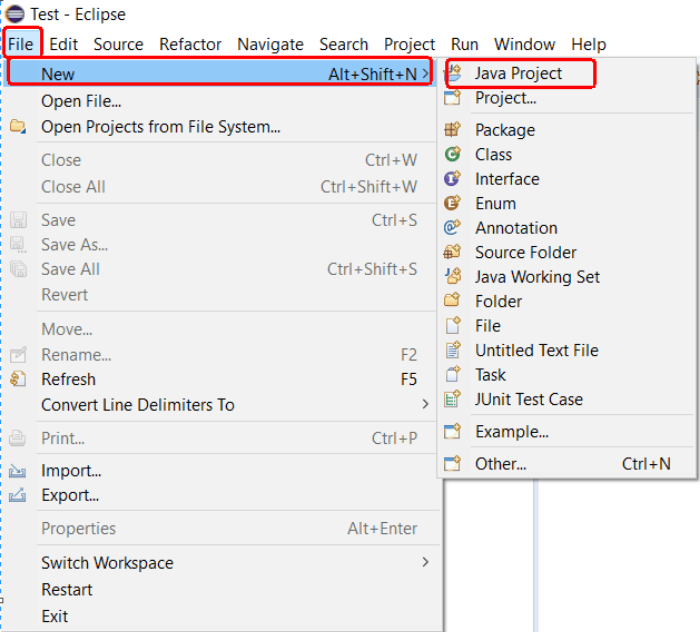
Step 1: In the menu of Eclipse IDE, click File Options -> Click New -> Select Java Project.
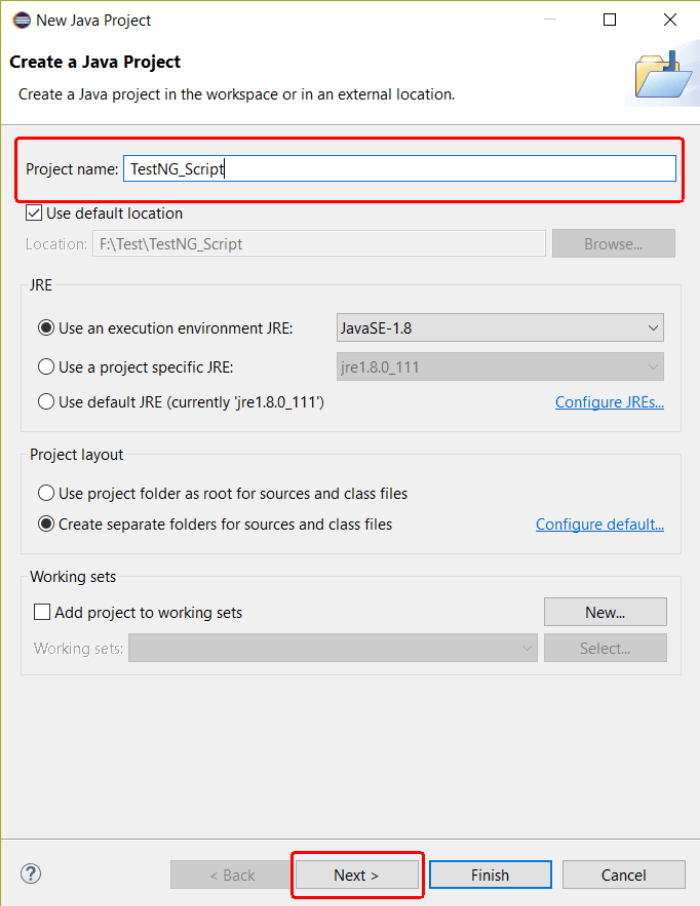
Step 2: Enter the project name as “TestNG_Script” and click on the “Next” button. As a last step, click the “finish” button and your java project is ready.
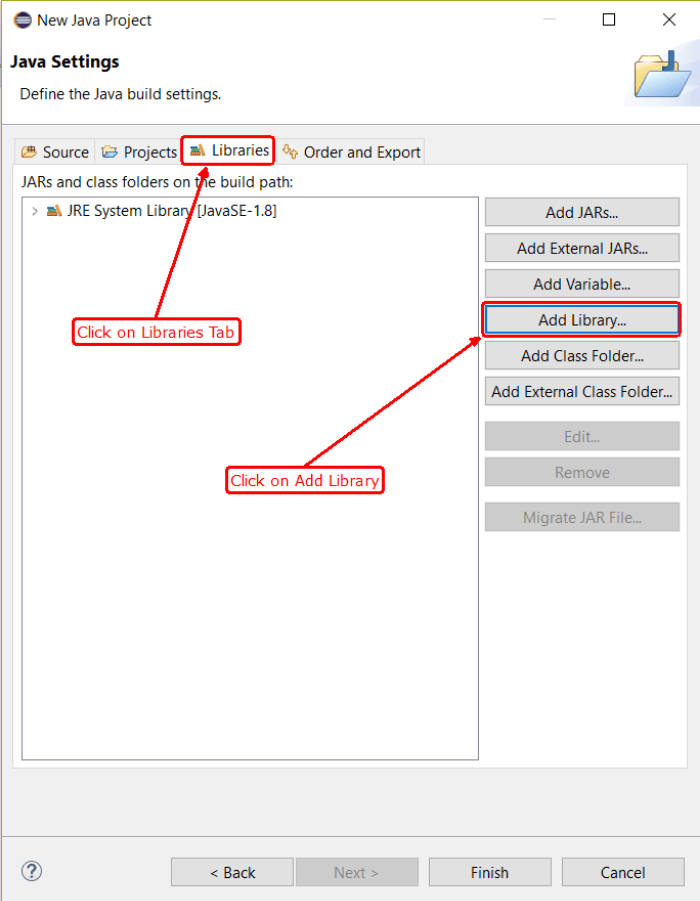
Step 3: The next step is to configure the TestNG Library in a newly created Java project. For that same, click on the “Libraries” tab under Configure Build Path. Click “Add Library” as shown below.
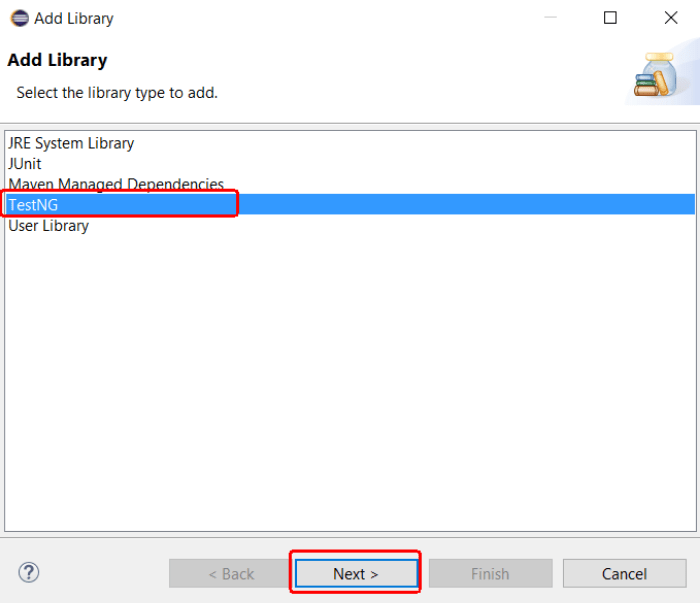
Step 4: The user will be promoted to configure his dialogue box to configure the user to configure. Select TestNG and click the “Next” button as shown below in the picture. Finally, click the “Finish” button.
Step 5: TestNG has now been added to the Java project and after the expansion of the project, the required libraries can be viewed in the package explorer.

2. Create TestNG class:
Step 1: Expand the “TestNG_Script” project and go to the “src” folder. Right-click on “src” and go to New -> Other.

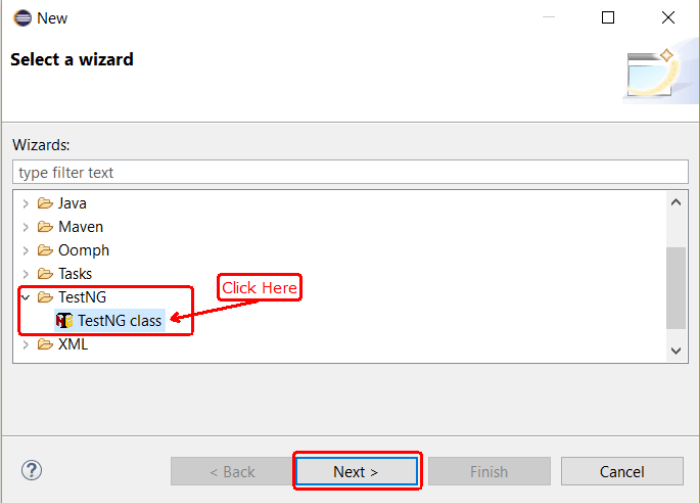
Step 2: Expand the TestNG option and select the “TestNG” class option and click on the “Next” button.
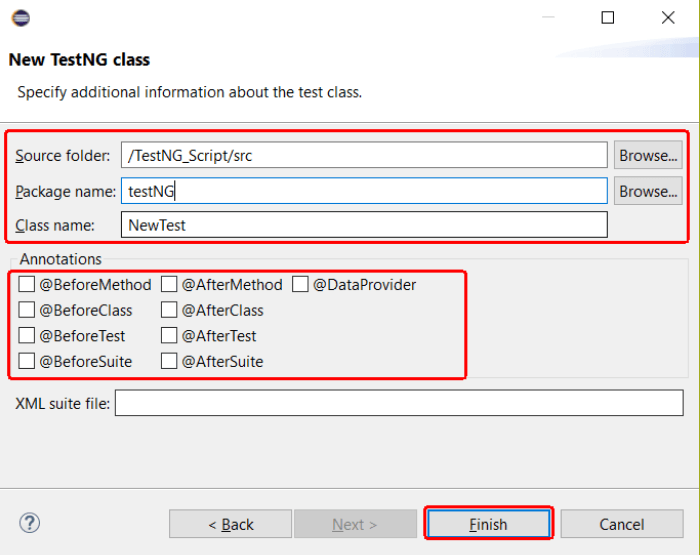
Step 3: Submit the required details as the following: Specify the name of the source folder, package name and TestNG class and click the finish button. Since it is clear from the picture below, the user can also see the various test-related comments appearing in the examination test scheme schema. Testing G annotations will be discussed later in this session.
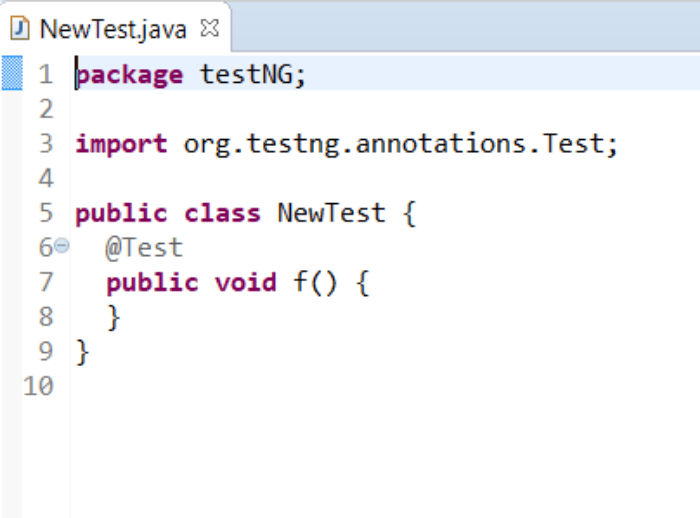
Step 4: The above mentioned TestNG class will be created with the default schema.
3. Execute the TestNG script:
- Click anywhere inside the editor or Java class inside the package explorer, choose “Run As” option and click on “TestNG Test”.
TestNG result shows in two windows:
- Console Window.
- TestNG Result Window
HTML Reports in TestNG:
- TestNG comes with a great ability to execute the user’s readable and easy HTML report for test execution. These reports can be viewed in any browser and can also be used by Eclipse’s build-in browser support.
To generate HTML reports, follow the steps below:
Step 1: Execute the newly created TestNG Class. Refresh the project containing the TestNG class by right-clicking on it and selecting the “Refresh” option.
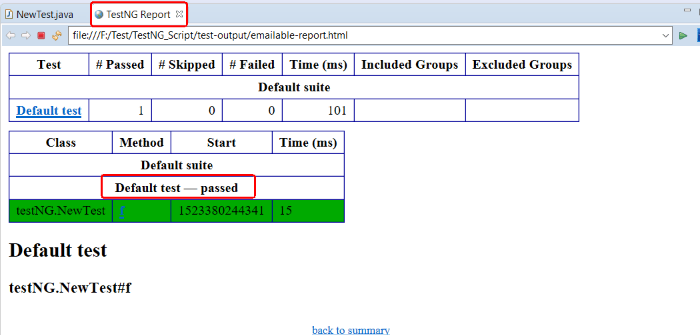
Step 2: A folder named “test-output” will be created in the project at the “src” folder level. Expand the “test-output” folder and open it on the “emailable-report.html” file with the Eclipse browser. The HTML file displays recent results for execution.

Step 3: The HTML report will be opened within the Eclipse environment.
Example of Create TestNG project with Script:
1 2 3 4 5 6 7 8 9 10 11 12 13 14 15 16 17 18 19 20 21 22 23 | import org.testng.annotations.Test; import org.testng.annotations.BeforeMethod; import org.testng.annotations.AfterMethod; public class NewTest { @Test public void f() { System.out.println("Test"); } @BeforeMethod public void beforeMethod() { System.out.println("beforeMethod"); } @AfterMethod public void afterMethod() { System.out.println("afterMethod"); } } |
Output:
1 2 3 4 5 | beforeMethod Test afterMethod |
- TestNG works with Annotations and annotation can be represented by @ symbol.
- @Test is one of the TestNG annotation. This annotation lets the program execution to know that method annotated as @Test is a test method it is compulsory and default. To be able to use different TestNG annotations, we need to import the package “import org.testng.annotations.*” to execute selenium TestNG script’s in Create TestNG project with Script.
.